Brush Settings & Configurations
Here we mingle, introduce ourselves, our thoughts and ideas and have caring discussions.
Oh jeeez.... most entertaining will be, that even I will have to remember, haha. But didn't I write something in the Downloads&Info manual? There wasn't too much to be said about it. You'd use the image capture ...oh, you could even create sequences of images.... I will have to remember all of it, but it wasn't much and wasn't tricky. Maybe, once I have remembered and found a moment, I'll record a decent video for youtube!  GOOD CALL!
Re: Brush Settings & Configurations
AH, I know again, haha... looks like I never did forget after all!
The way image brushes [0] works:
First you need put some paint on the canvas with any other brush, because you need to capture brush images.
Both color and material amount matter, as they all get captured and then used. Whereby you can later turn on/off the use of the captured images' colors or only the material amount.
Once you have some paint you wish to capture, press [i] to bring up the capture rectangle. You can then move, resize and even deform this rectangle over what you wish to capture.
Press [i] again to finish. You then can change the paint, if you wish to, and do the same again ( [i] to bring up the rectangle and [i] to finish again ). You can do that as many times as you wish to, creating a sequence of images.
Once you're done you can turn on brush #10 [0] and it will paint, using the first image.
In the tiny GUI in the upper left corner you can then set some of the behavior. For example, the lower row of buttons, starting with [COL] is followed by the animation parameter toggle button [ =? ]. You can click on it to toggle through various animation behaviors.
[ =? ] Every stroke gets one random image out of your sequence
[ = ] only uses the image you have selected (You can click on any of the images to choose it, by the way)
[ >> ] animates through the entire sequence while your painting with every stipple advancing to the next image. Speed depends on the brush setting's stipple density, which is in the brush GUI on the right the dial called "BRISTLES". Turn it to 100% for maximum speed/stipple density.
[ pr ] your pen pressure will choose which image of the sequence is chosen, frome 0 pressure being the first image to 100% pressure the last.
[ >? ] every stipple will get a random image out of your sequence.
That's all of those behaviors for now.
[ COL ] the color toggle turns on/off the use of color or just the material amount.
OH, the empty button after the animation behavior is IMPORTANT! Turn it on, and use AVERAGE [Shift]+[Ctrl] and it will use the color under the center of your brush while you paint to tint the image your painting with. Enormous feature!!!
And I did forget the shortcut to toggle it, haha... pffff
When you paint with your image brush, the color you've chosen will multiply with the color of the images you've captured. Choose white to get the full color of them or any other color to tint them.
Armed with that knowledge you can already accomplish a great deal of things. There are only a few more things that are interesting:
[ USE ] will activate images for other brushes like #2, #3 and #9.
[ P ] is turning on perspective correction, if you had deformed your rectangle to capture 3d planes. Unlikely you'll have to or want to use it, but it's pretty awesome. I wrote an interesting shader to make this possible.
Things you can do with this are endless. From wicked nonsense to using it for custom brush stipple changes, using [ PR ] mode to have pressure go through your painted density of paint. Just endless possibilities, really.
My plan was to add even more animation options and proper GUI for all of it, of course. But hey... there will come a day!
Posts: 19
Joined: Sat May 30, 2020 9:38 pm
Re: Brush Settings & Configurations
Oh my god, draw the brush in WHITE.... Okay, helps a lot, already explains a lot of how the attempts at original brushes were behaving. By habit with other programs, drew the brush head in BLACK.
Brushes seem to 'strobe', even with BRISTLES set at 100. Is this a video card problem? Is this a matter where a superior computer will have a smoother effect? Or, is it how quickly I draw on my computer? (I don't mind investing in my computer but I often don't think to upgrade it, because I don't play video games.)

I draw with a very fast motion. Slower motion seems to resolve this.
Very powerful brush function. Thank you.
Brushes seem to 'strobe', even with BRISTLES set at 100. Is this a video card problem? Is this a matter where a superior computer will have a smoother effect? Or, is it how quickly I draw on my computer? (I don't mind investing in my computer but I often don't think to upgrade it, because I don't play video games.)

I draw with a very fast motion. Slower motion seems to resolve this.
Very powerful brush function. Thank you.
Re: Brush Settings & Configurations
Yes, the image brush (#0) only stipples "when it can", haha. That means, the density of them depends on the speed of your machine. You could turn on the "HIGH SPEED" mode, but it may not make a difference, depending on your video card.
However, Vervette will have brushes that relentlessly stipple at a given distance, if so desired, and will solve that issue, while at the same time risking to create some slowdowns.
Anyway, as with all tools, their wonders truly start to work for you, if you let them. That means, find out how you can work best with the image brush and it will be a pretty reliable source of joy, I can almost promise hat!
OOOHHH, BUT one more thing: You can turn on "USE" and use them with brush #9!!! Go to the highest bristle density for it and it will almost be like creating continuous strokes with the image!!! Try it!
Re: Brush Settings & Configurations
And another thing: [a] toggles the lock for brush orientation. This becomes particularly interesting with image brushes!!! 

OH, and also, if you hold [Ctrl] and click on a brush image, you delete it! Also useful to know.

OH, dear lord, and one more thing that's super interesting: {right click] on the image capture frame locks that frame, so you can easily capture several images while modifying them between takes.
DANG, I have to make a video for this... pfffff....
OH, and also, if you hold [Ctrl] and click on a brush image, you delete it! Also useful to know.
OH, dear lord, and one more thing that's super interesting: {right click] on the image capture frame locks that frame, so you can easily capture several images while modifying them between takes.
DANG, I have to make a video for this... pfffff....
Re: Brush Settings & Configurations
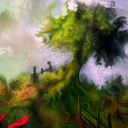
Awww, man, I almost forgot how much fun this is. I've made a couple of twigs with pseudo leaves, then made a few swatch color sequences, held down [N] as I was just doodling this with #9 and [USE] and [>?] on the image sequence and it comes out so interesting in seconds, haha. Too much fun!
Posts: 19
Joined: Sat May 30, 2020 9:38 pm
Re: Brush Settings & Configurations
Taron wrote:Yes, the image brush (#0) only stipples "when it can", haha. That means, the density of them depends on the speed of your machine. You could turn on the "HIGH SPEED" mode, but it may not make a difference, depending on your video card.
However, Vervette will have brushes that relentlessly stipple at a given distance, if so desired, and will solve that issue, while at the same time risking to create some slowdowns.
Do you have a recommended video card in the $450-550 range? I do not mind updating my computer when I have a reason to update it. I just have not had a reason lately.
Anyway, as with all tools, their wonders truly start to work for you, if you let them. That means, find out how you can work best with the image brush and it will be a pretty reliable source of joy, I can almost promise hat!
OOOHHH, BUT one more thing: You can turn on "USE" and use them with brush #9!!! Go to the highest bristle density for it and it will almost be like creating continuous strokes with the image!!! Try it!
The brush tool is clearly very powerful, and I am very grateful for the explanation. This was very, very helpful, so I am very appreciative.
Re: Brush Settings & Configurations
That's a really good budget! By now I would guess that any Nvidia card that falls inside that budget will do just fine! I'm no expert, but my experiences with Nvidia have been really good. Right now I'm on a mobile AMD Radeon that is in this miniPC. It's surprisingly good, considering the whole machine was around $500. But AMD is really a little clunky with certain things, where NVidia just blazes through them. In other things they are easily on par. Not sure what it is, but it feels to me like AMD has more issues dealing with memory speed or management than NVidia. Just a wild assumption.
Either way, today it's hard to go wrong with any video card above $100, I imagine.
And you are VERY welcome! In fact, thank you for bringing me back into it, it's such a pleasure!
Either way, today it's hard to go wrong with any video card above $100, I imagine.
And you are VERY welcome! In fact, thank you for bringing me back into it, it's such a pleasure!
Posts: 4
Joined: Sat Aug 19, 2023 5:00 pm
Re: Brush Settings & Configurations
kannika wrote:Brushes seem to 'strobe', even with BRISTLES set at 100. Is this a video card problem? Is this a matter where a superior computer will have a smoother effect? Or, is it how quickly I draw on my computer? (I don't mind investing in my computer but I often don't think to upgrade it, because I don't play video games.)
I'm getting this issue too. I swear it didn't happen when I was using it earlier, but suddenly every brush has this weird oscillating effect that makes them unusable. I tried restarting my tablet drivers, restarting my PC, deleting the program and reinstalling, etc. Did I mess up a brush setting? Press the wrong button? I'm genuinely confused.

Device specs:
CPU: Intel(R) Core(TM) i5-9600K CPU @ 3.70GHz 3.70 GHz
RAM: 32.0 GB
GPU: Nvidia RTX 2070 SUPER
GPU: Nvidia 2070 SUPER / CPU: Intel(R) Core(TM) i5-9600K CPU @ 3.70GHz / RAM: 32GB / OS: Win10
Check out my Neocities webpage!
The world's most chaotic autodidact
Check out my Neocities webpage!
The world's most chaotic autodidact
Re: Brush Settings & Configurations
Hmmm... Brush #1 to #5 have this as part of their nature, which goes fine with fluidity up, but looks a bit awkward without any fluidity.
Brush #6 to #9 should not have any of it, especially without fluidity up. Except that the canvas now works properly and #9 really shows that now.
When you start Verve without changing the brush, does this happen, too?
Anyway, those first brushes are truly designed for working with the fluids and were the first brushes I had developed. Especially in large sizes their power shows a lot.
Nowadays, though, I mostly work with #9 when I want to really paint. But for large areas or specific effects, all brushes come into play.
Return to Community [feedback, bug reports, discussions, etc...]
Who is online
Users browsing this forum: No registered users and 3 guests


